
Jak używać Micro Managera w zastosowaniach mikroskopowych

Micro Manager to oprogramowanie open-source opracowane do sterowania i automatyzacji zastosowań mikroskopowych. Micro Manager został opracowany jako kompletny pakiet do akwizycji obrazu i sterowania mikroskopem, dostępny dla systemów Windows, Linux i Mac. Ponieważ jest oprogramowaniem Open Source, można go łatwo rozszerzać na potrzeby konkretnych wymagań (np. własne sterowniki kamery). Oferuje pełną integrację z ImageJ, pakietem do przetwarzania obrazu. Ten artykuł wyjaśnia, jak zainstalować i używać kamery Daheng z Micro Manager.
Installation
Before installing micro manager, please make sure that you have installed our SDK first. Check our QuickStart article, for a detailed guide on how to install our SDK.
Download micro manager from the official website using the form below and follow the instructions.
Then Download the Daheng.dll from our download area and copy it to the Micro Manager installation directory (e.g. C:\Program Files\Micro-Manager-2.0).
Step 1
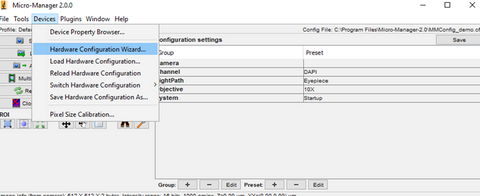
Now you can select the Daheng.dll via the Hardware Configuration Wizard.
Step 2
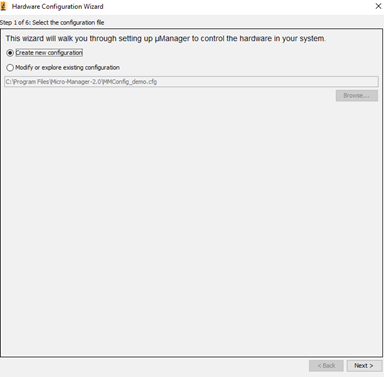
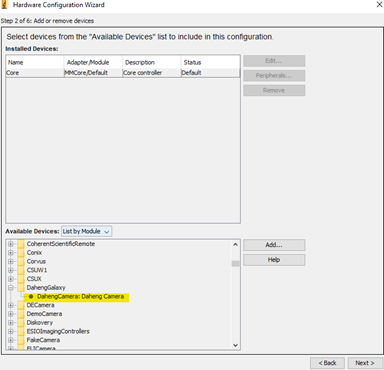
Follow the Wizard as shown in the screenshots on the right: First create new Configuration.
Step 3
Look for the Daheng Imaging directory and select the file contained. Click on Add… and select OK.
Step 4
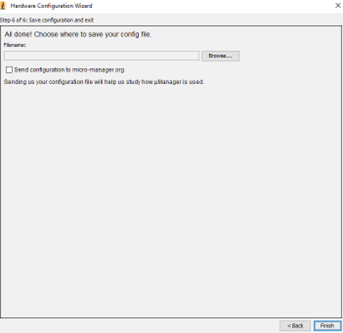
Click on Next until you get to the following Window.
Step 5
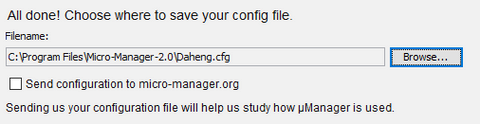
- Create a new config file (e.g. Daheng.cfg).
- Click on finish when you’re done.
Step 6
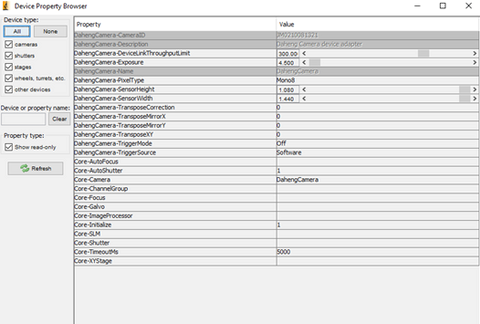
Connect Daheng Cameras: You can change the camera’s parameters in the Device Property Browser.
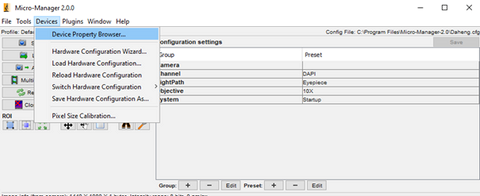
Please note that not every Parameter might be changeable at the moment.
Step 7
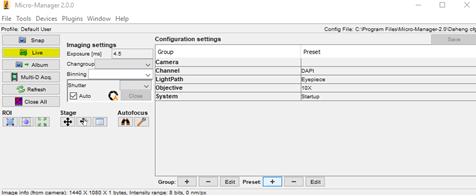
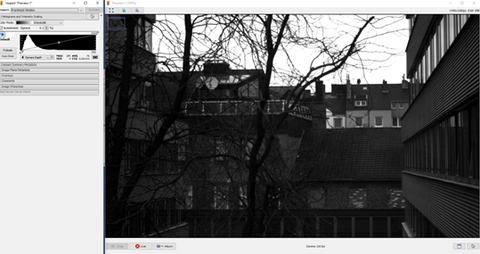
After setting up the camera you can start the acquisition by clicking on the Live Button.
Live Image Example
Support
If you need further help with Micro Manager, you can find the official forum under this link: Micro-Manager Community.