How to Save Camera Parameters in 3 Simple Steps
Once you have configured your camera according to your application requirements, you can store these settings directly in the camera. This ensures that when the camera is rebooted or powered on again, it will start with your saved settings.
Table of contents
Step 1: Configure “UserSetControl” Settings
- Open GalaxyViewer software and connect to your camera.
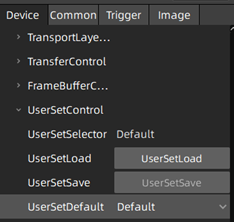
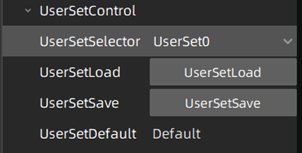
- Navigate to UserSetControl in the Device menu.
- By default, the camera is set to “Default” UserSet when first connected.
- Adjust the following parameters as needed:
- UserSetSelector → Choose which UserSet to modify.
- UserSetLoad → Load the selected UserSet settings.
- UserSetSave → Save the current camera settings to the selected UserSet.
- UserSetDefault → Select which UserSet should be applied at camera boot.
Step 2: Save Your Parameters to the Camera
To store optimized parameters (such as exposure time, gain, and white balance) for your specific application:
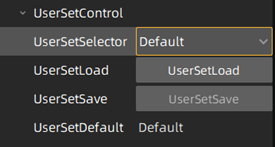
- Select the UserSet where the parameters should be stored (e.g., UserSet0).
- Click “UserSetSave” to save the current camera parameters into UserSet0.
- Your settings are now saved and will persist after a reboot.
Step 3: Boot the Camera with Your Saved Parameters
To ensure the camera boots with your saved settings:
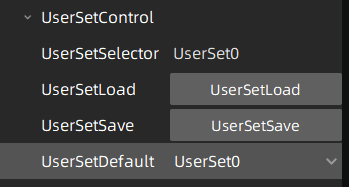
- Set UserSetDefault to UserSet0 (instead of the default setting).
- When the camera reboots, it will automatically load the parameters saved in UserSet0.
Important Notes on Saving Parameters
- Software may overwrite camera parameters after boot.
For example, the GevSCPS parameter is automatically modified by Galaxy Viewer after startup.
- Prevent automatic overwrites:
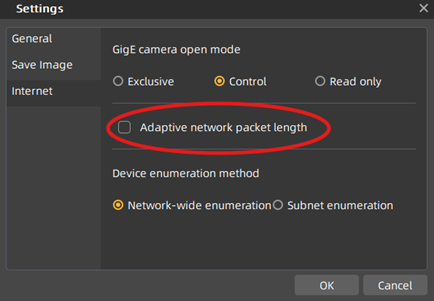
Navigate to Settings -> General and disable the “Adaptive Network Packet Length” option (selected by default). This feature enables the value of the packet size to be set automatically according to the network conditions

By following these three steps, you can save, load, and boot your camera with the required parameters, ensuring consistent performance every time.
