How to use a Python sample to acquire images with Python script using PyCharm
This guide will walk you through setting up your development environment using PyCharm IDE and acquire images with the Galaxy SDK on Windows 11.
PyCharm is a powerful Integrated Development Environment (IDE) developed by JetBrains, specifically used for Python programming. The free, open-source edition, PyCharm Community, is available for download and provides all the essential tools needed for efficient coding and debugging.
With the Galaxy Python SDK, you can create Python applications to interface with GigE or USB industrial cameras. At the end of this guide, you'll have a working setup that lets you capture images using Python.
Table of contents
Step 1: Install Galaxy Windows SDK
1. Download the Galaxy Windows SDK from the VA Imaging’s download page
2. Extract the downloaded file and run the installation file.
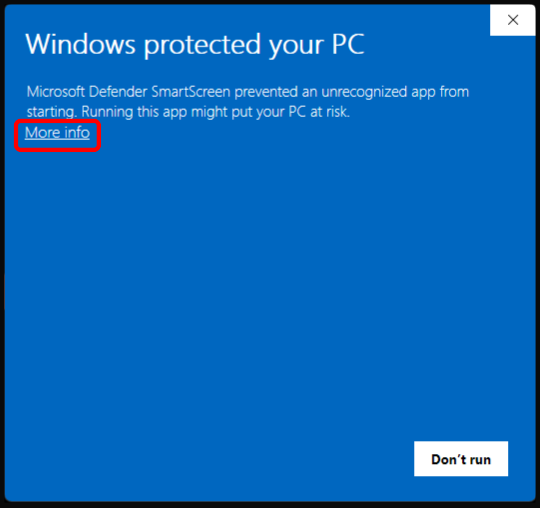
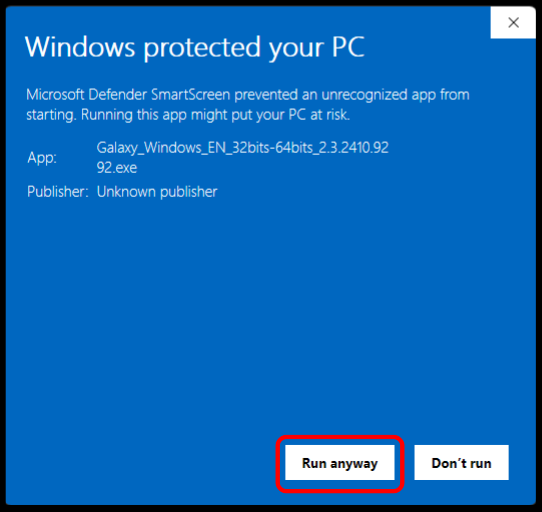
3. If Windows shows a security prompt:
• Click “More info”
• Then click “Run anyway”
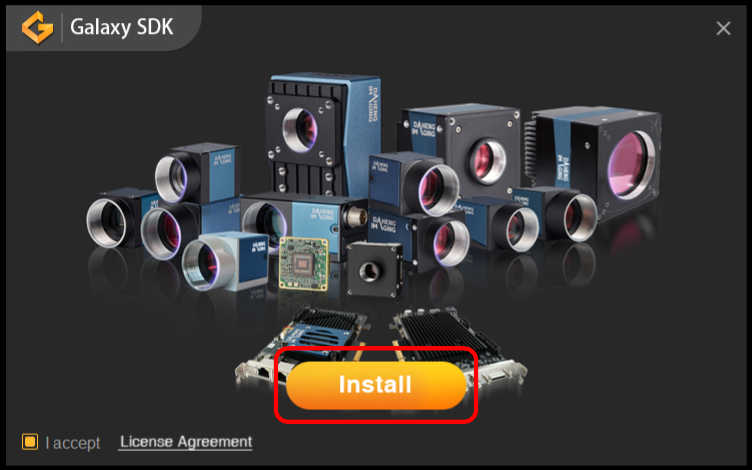
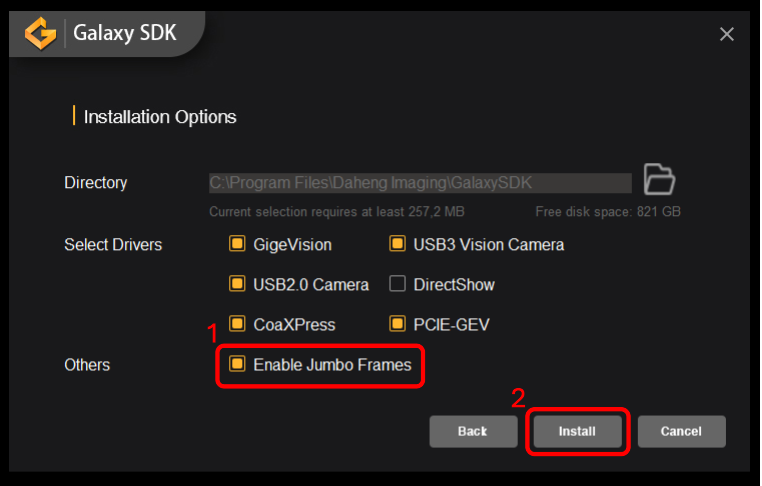
4. In the setup window, click “Install”.
Step 2: Install Python
If Python is not already installed on your system, follow these steps to install it:
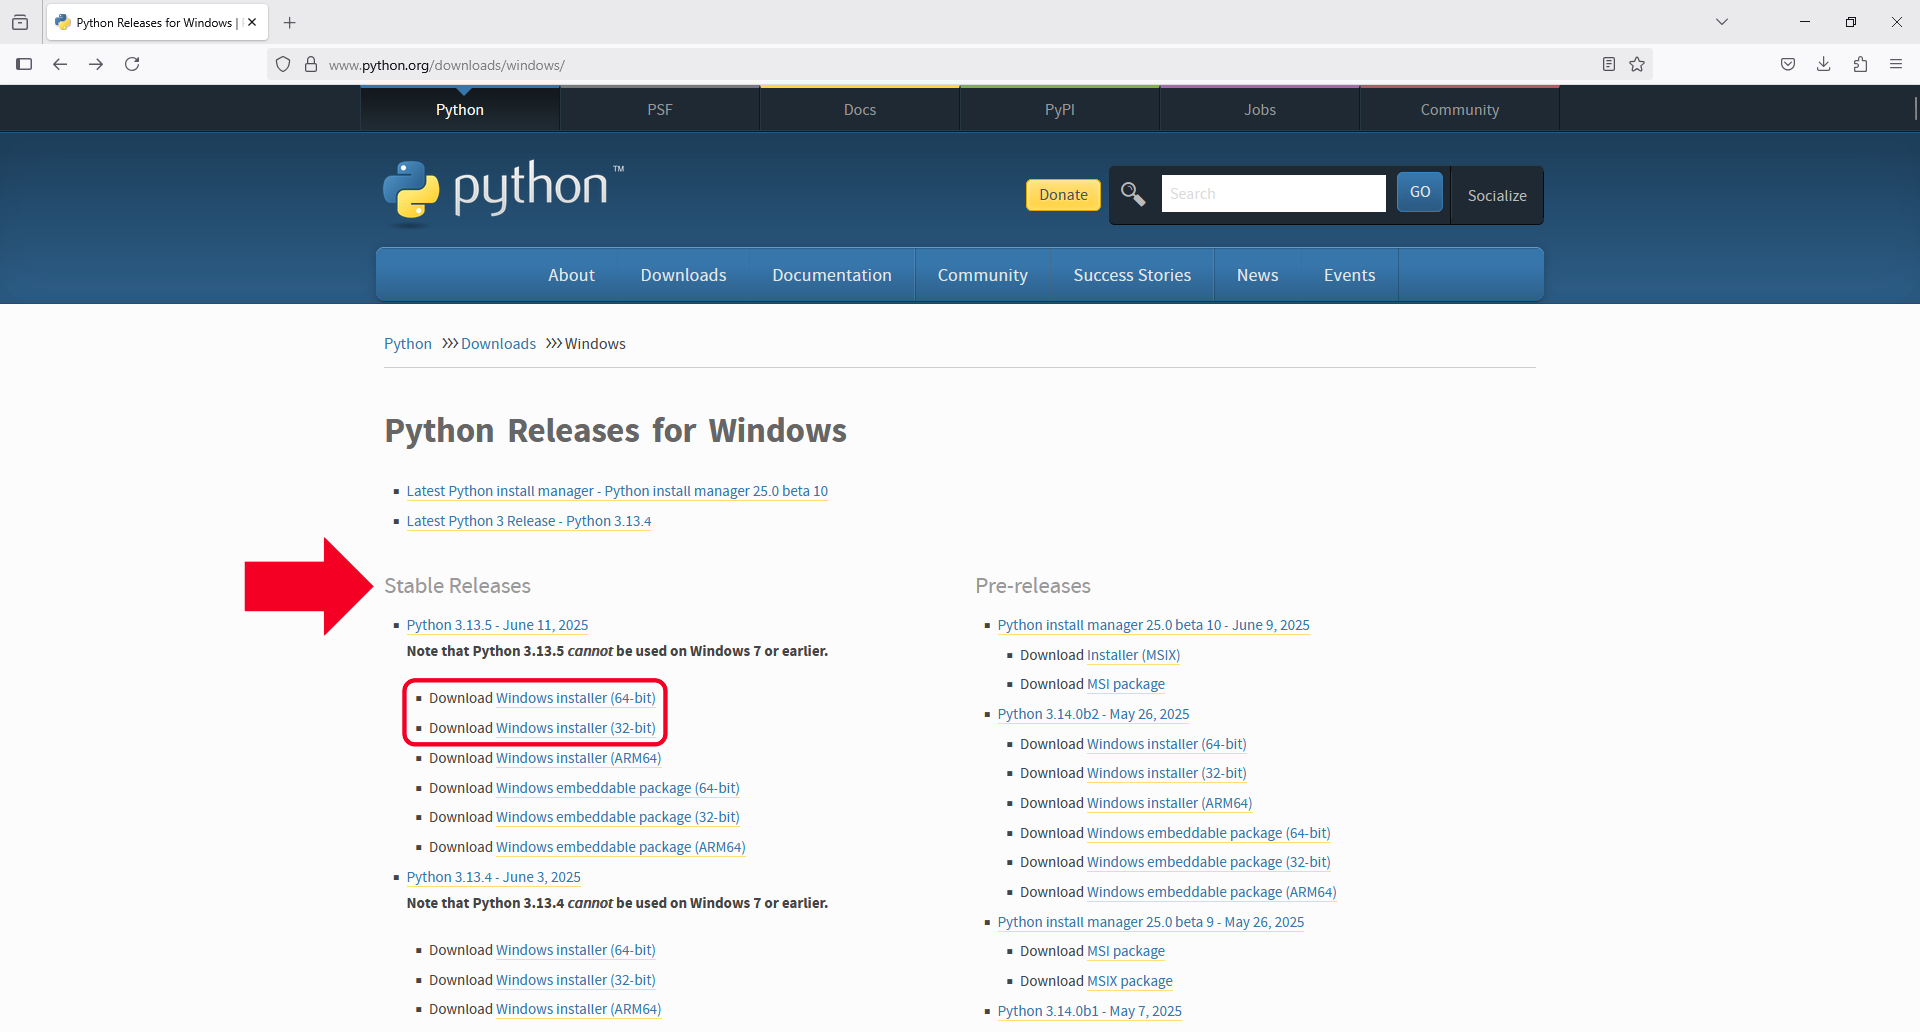
1. Go to python.org/downloads/windows and download the latest stable version of Python (choose 64-bit or 32-bit depending on your system).
2. Run the downloaded installer and follow the on-screen instructions.
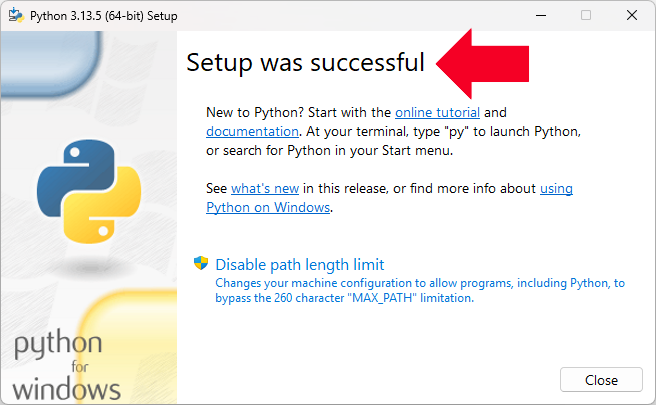
3. Once the installer displays “Setup was successful,” Python is ready.
Step 3: Install PyCharm
1. Download the PyCharm Community Edition from jetbrains.com/pycharm/download.
2. Run the installer and follow the prompts. Accept the default settings unless you have specific preferences.

Step 4: Configure the Environment in PyCharm
1. Open the Project
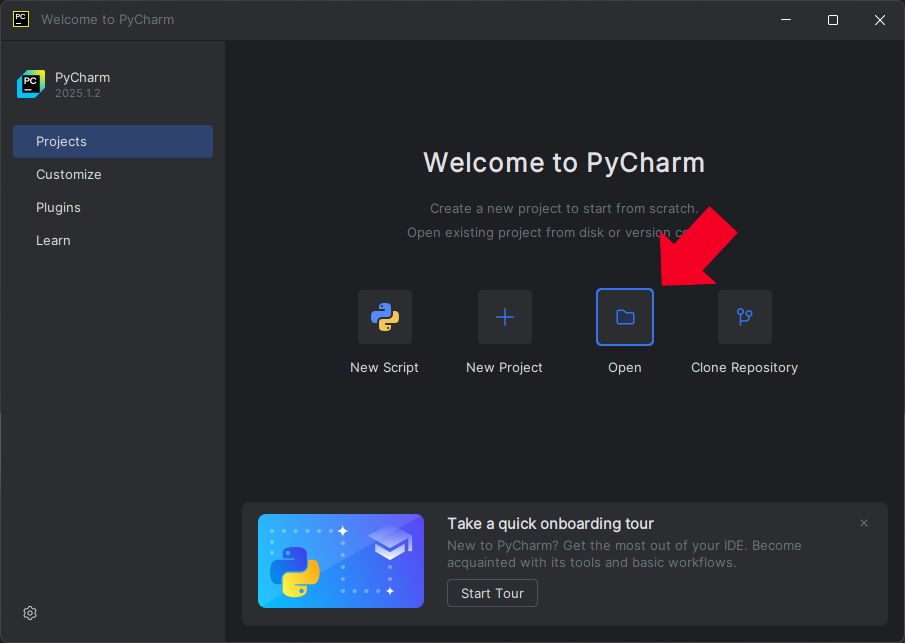
1. Open PyCharm.
2. Click “Open”.
3. Navigate to the following path:
C:\Program Files\Daheng Imaging\GalaxySDK\Development\Samples\Python
Select the “Python” folder, then click “Select Folder.”
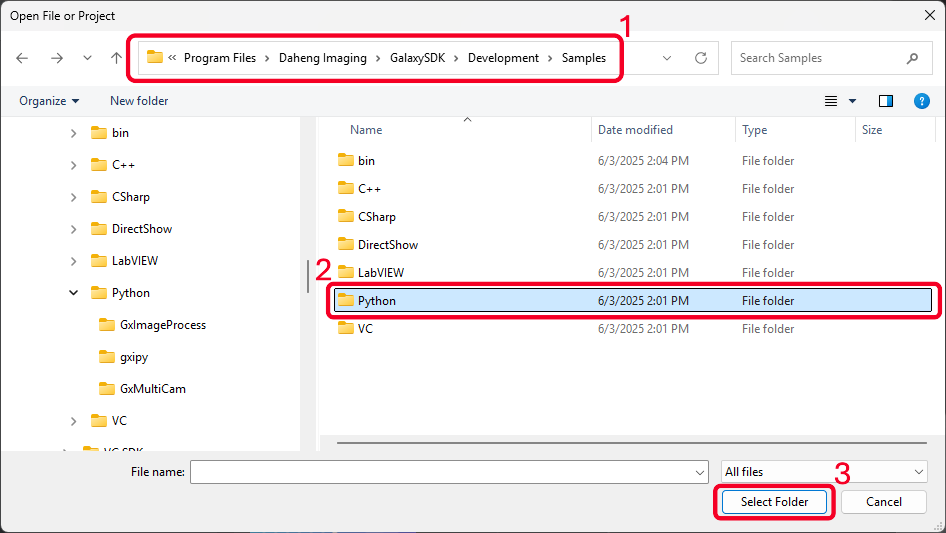
4. When prompted with “Trust and Open Project?”, click “Trust Project.”
Note: Ensure the gixpy folder (Galaxy SDK Python library) is present in the project directory.

2. Install Required Python Packages
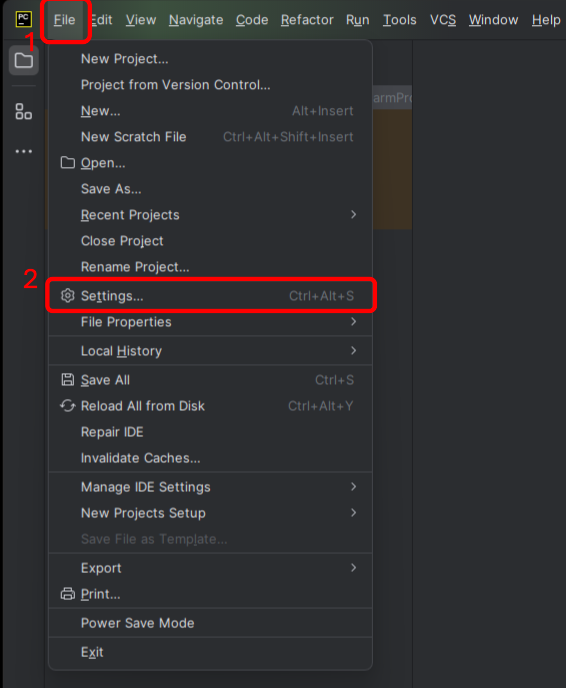
1. Once the project is opened, go to File > Settings.
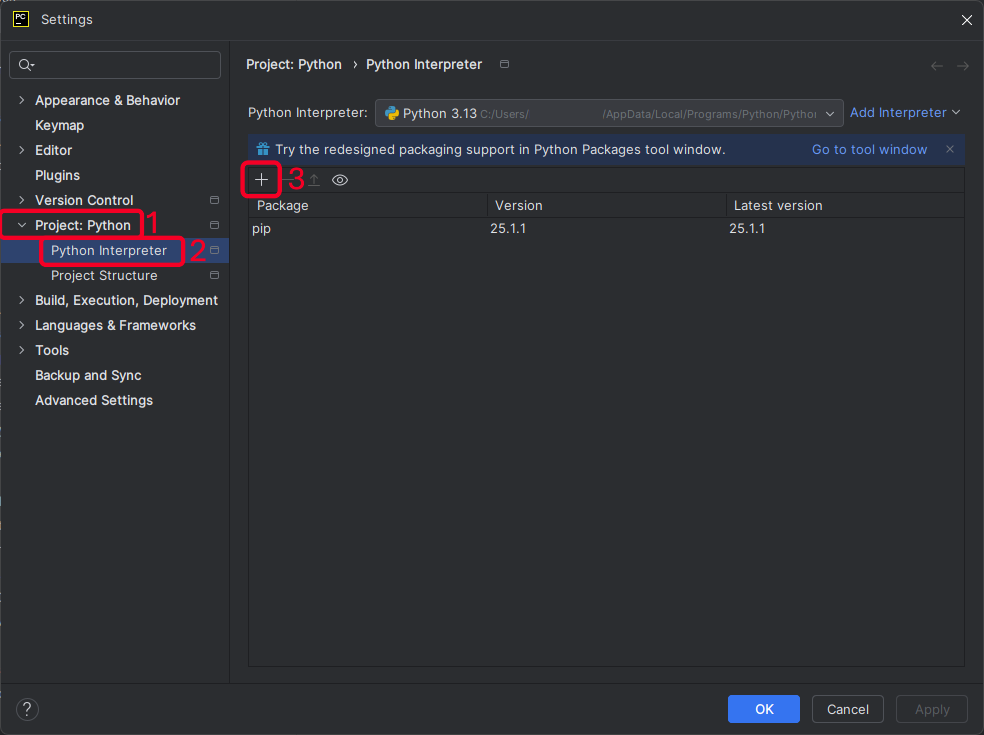
2. Under Project > Python Interpreter, click the “+” icon to add packages.
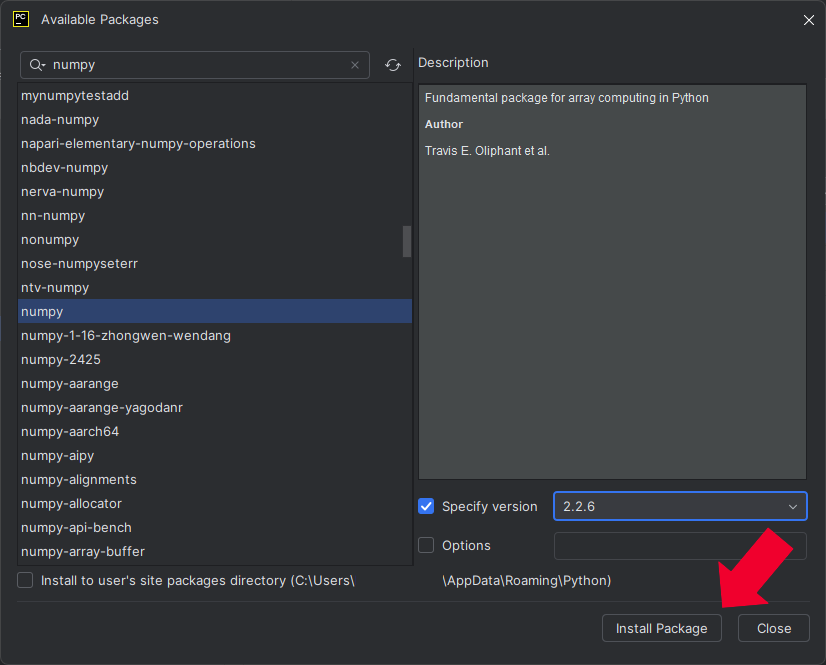
3. Search for the package “numpy” and select version 2.2.6 or lower.
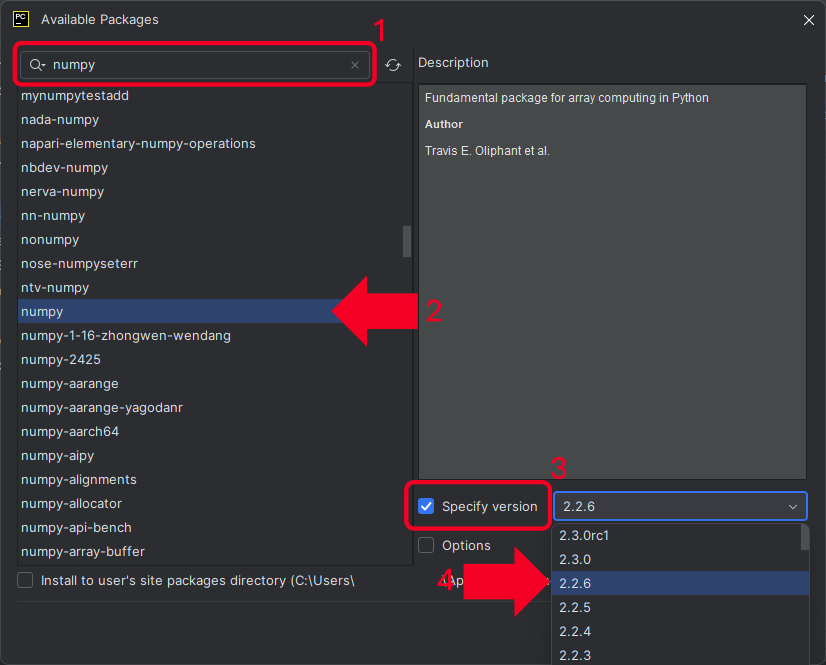
4. Click “Install Package”.
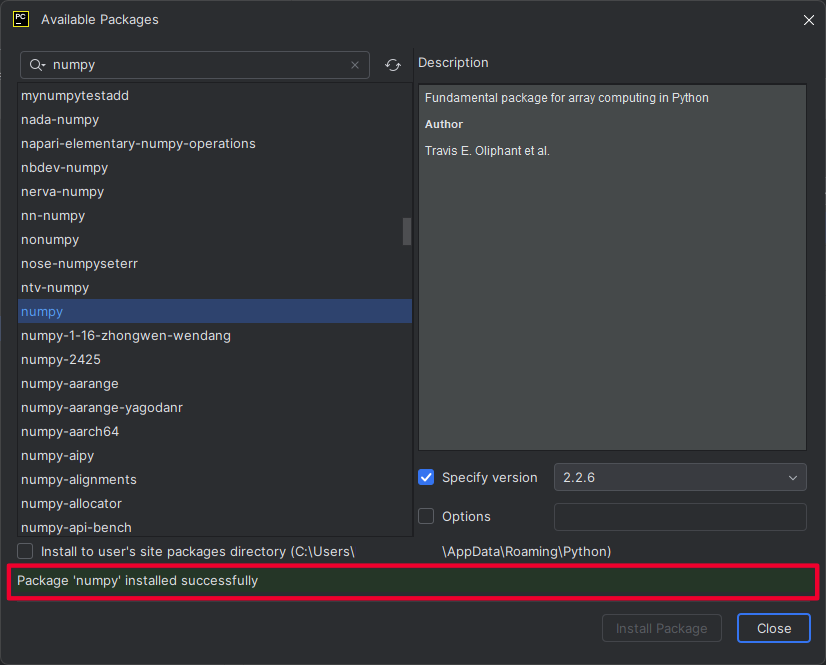
5. You should see a green confirmation message once the installation is complete.
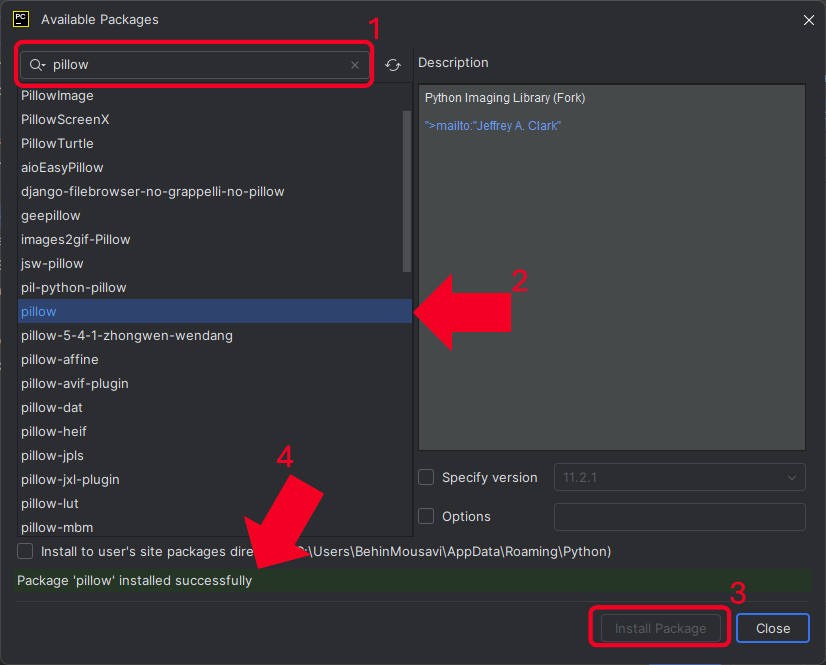
6. Repeat the process for package “pillow” but install the latest version (tested up to 11.2.1).
3. Verify Python Interpreter
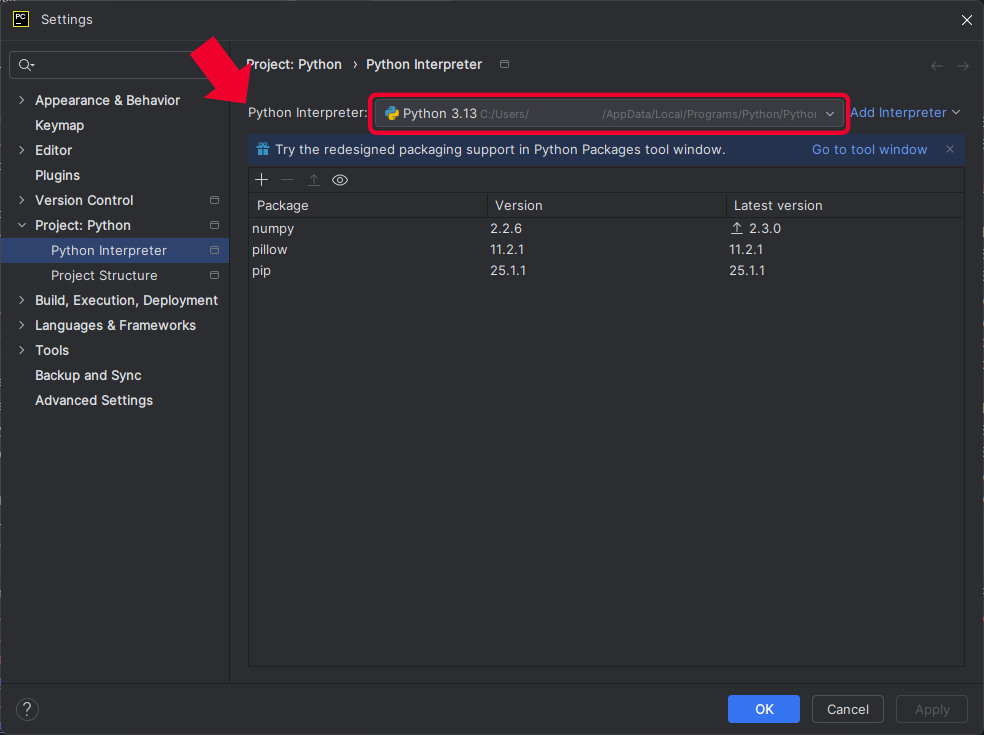
• PyCharm should automatically detect the Python installation from Step 2.
• If it doesn’t, ensure Python is properly installed and configured in Project > Python Interpreter.
Step 5: Run a Sample Program and Acquire an Image
1. In the project, open any sample script that fits your use case.
2. Click Run to execute the program.
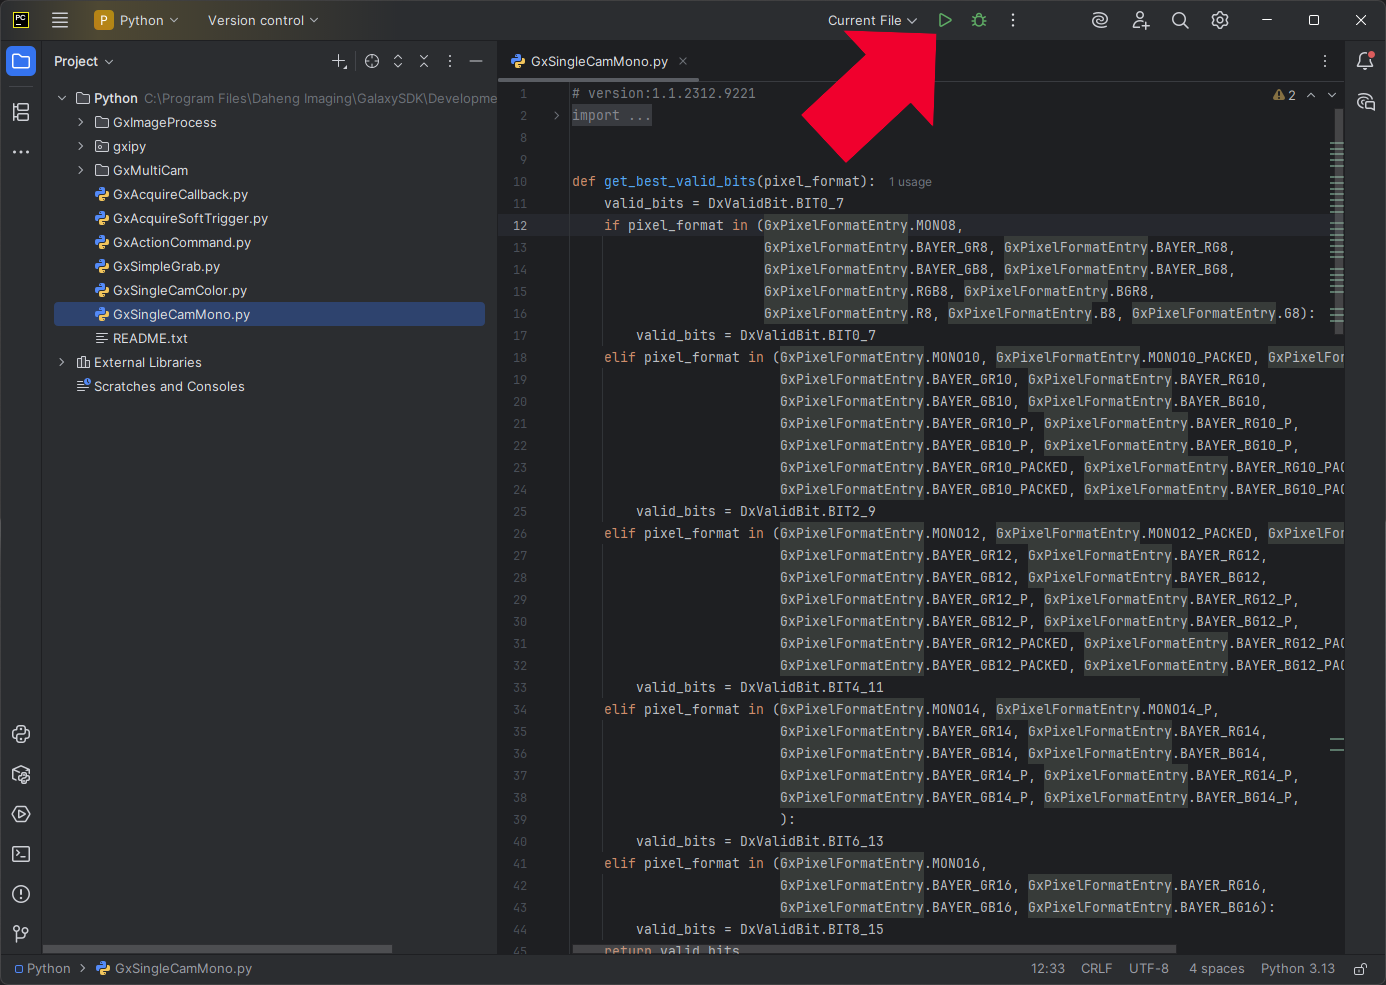
3. Confirm that the script runs without errors and the image acquisition is successful.
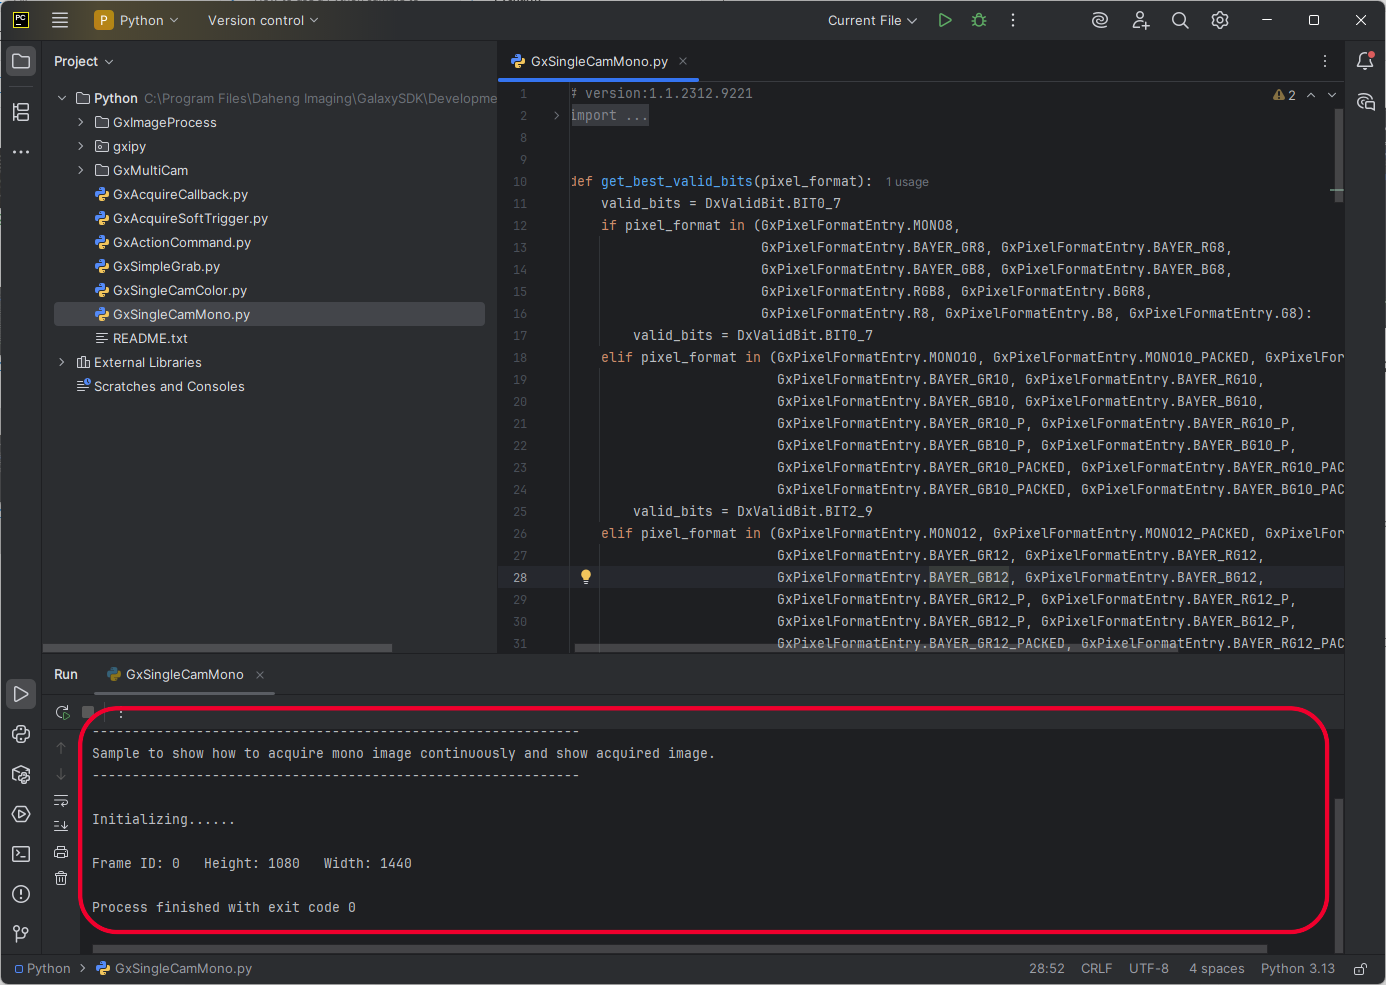
If you have followed these steps you are now able to acquire images by running python scripts in Pycharm.
If you have any questions about downloading, installing and running Python and PyCharm, make sure to contact our Technical Support division or fill in the form below. They are always happy to help you out.


