Como utilizar uma amostra em Python para adquirir imagens com um script Python usando o PyCharm
Este guia irá orientá-lo na configuração do seu ambiente de desenvolvimento utilizando o PyCharm IDE e na aquisição de imagens com o Galaxy SDK no Windows 11.
O PyCharm é um poderoso Ambiente de Desenvolvimento Integrado (IDE) desenvolvido pela JetBrains, utilizado especificamente para programação em Python.g. A edição gratuita e de código aberto, PyCharm Community, está disponível para download e fornece todas as ferramentas essenciais necessárias para uma programação e depuração eficientes.
Com o Galaxy Python SDK, pode criar aplicações Python para interagir com câmaras industriais GigE ou USB. No final deste guia, terá uma configuração funcional que lhe permite capturar imagens utilizando Python.
Índice
Passo 1: Instale o Galaxy Windows SDK
1. Descarregue o Galaxy Windows SDK a partir da página de transferências da VA Imaging
2. Extraia o ficheiro descarregado e execute o ficheiro de instalação.
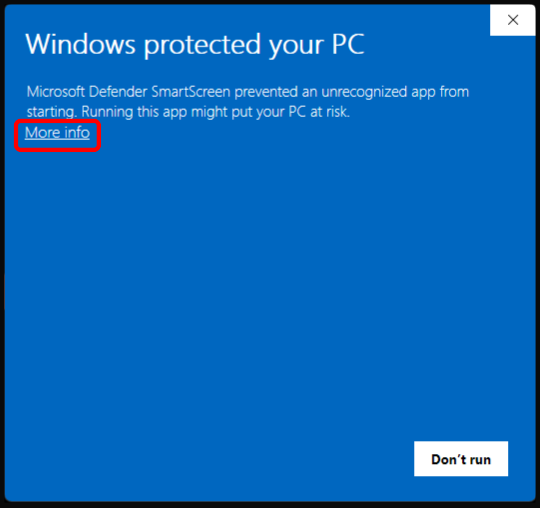
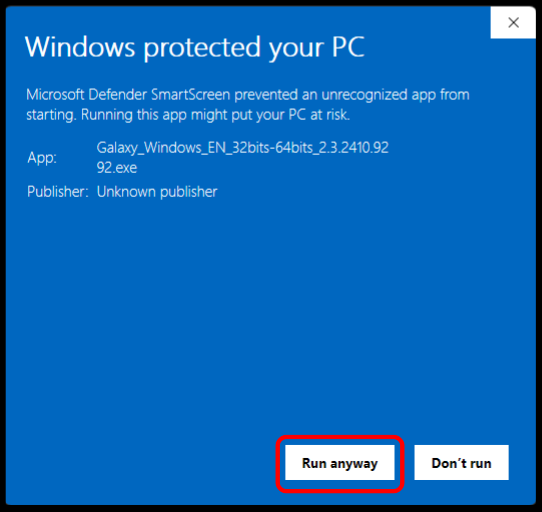
3. Se o Windows apresentar um aviso de segurança:
• Clique em “Mais informações”
• Em seguida, clique em “Executar mesmo assim”
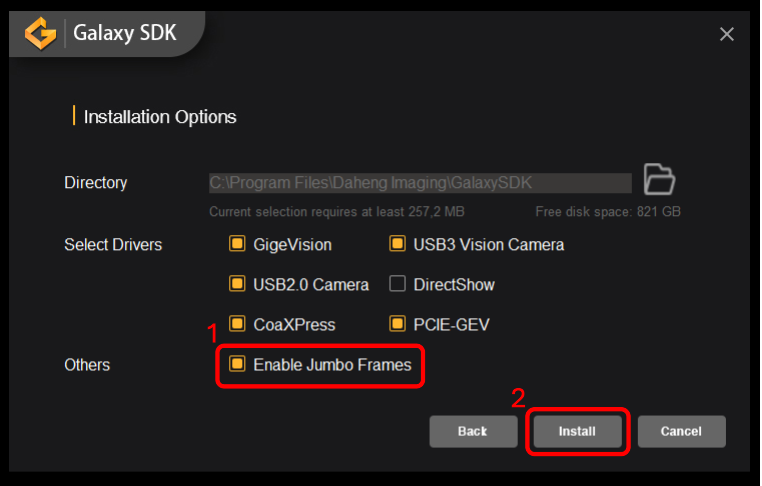
4. Na janela de configuração, clique em “Instalar”.

5. Para câmaras GigE, certifique-se de que a opção "Ativar Jumbo Frames" está ativada antes de continuar a instalação.
Passo 2: Instale o Python
Se o Python ainda não estiver instalado no seu sistema, siga estes passos para o instalar:
1. Aceda a python.org/downloads/windows e faça o download da versão estável mais recente do Python (escolha 64-bit ou 32-bit consoante o seu sistema).
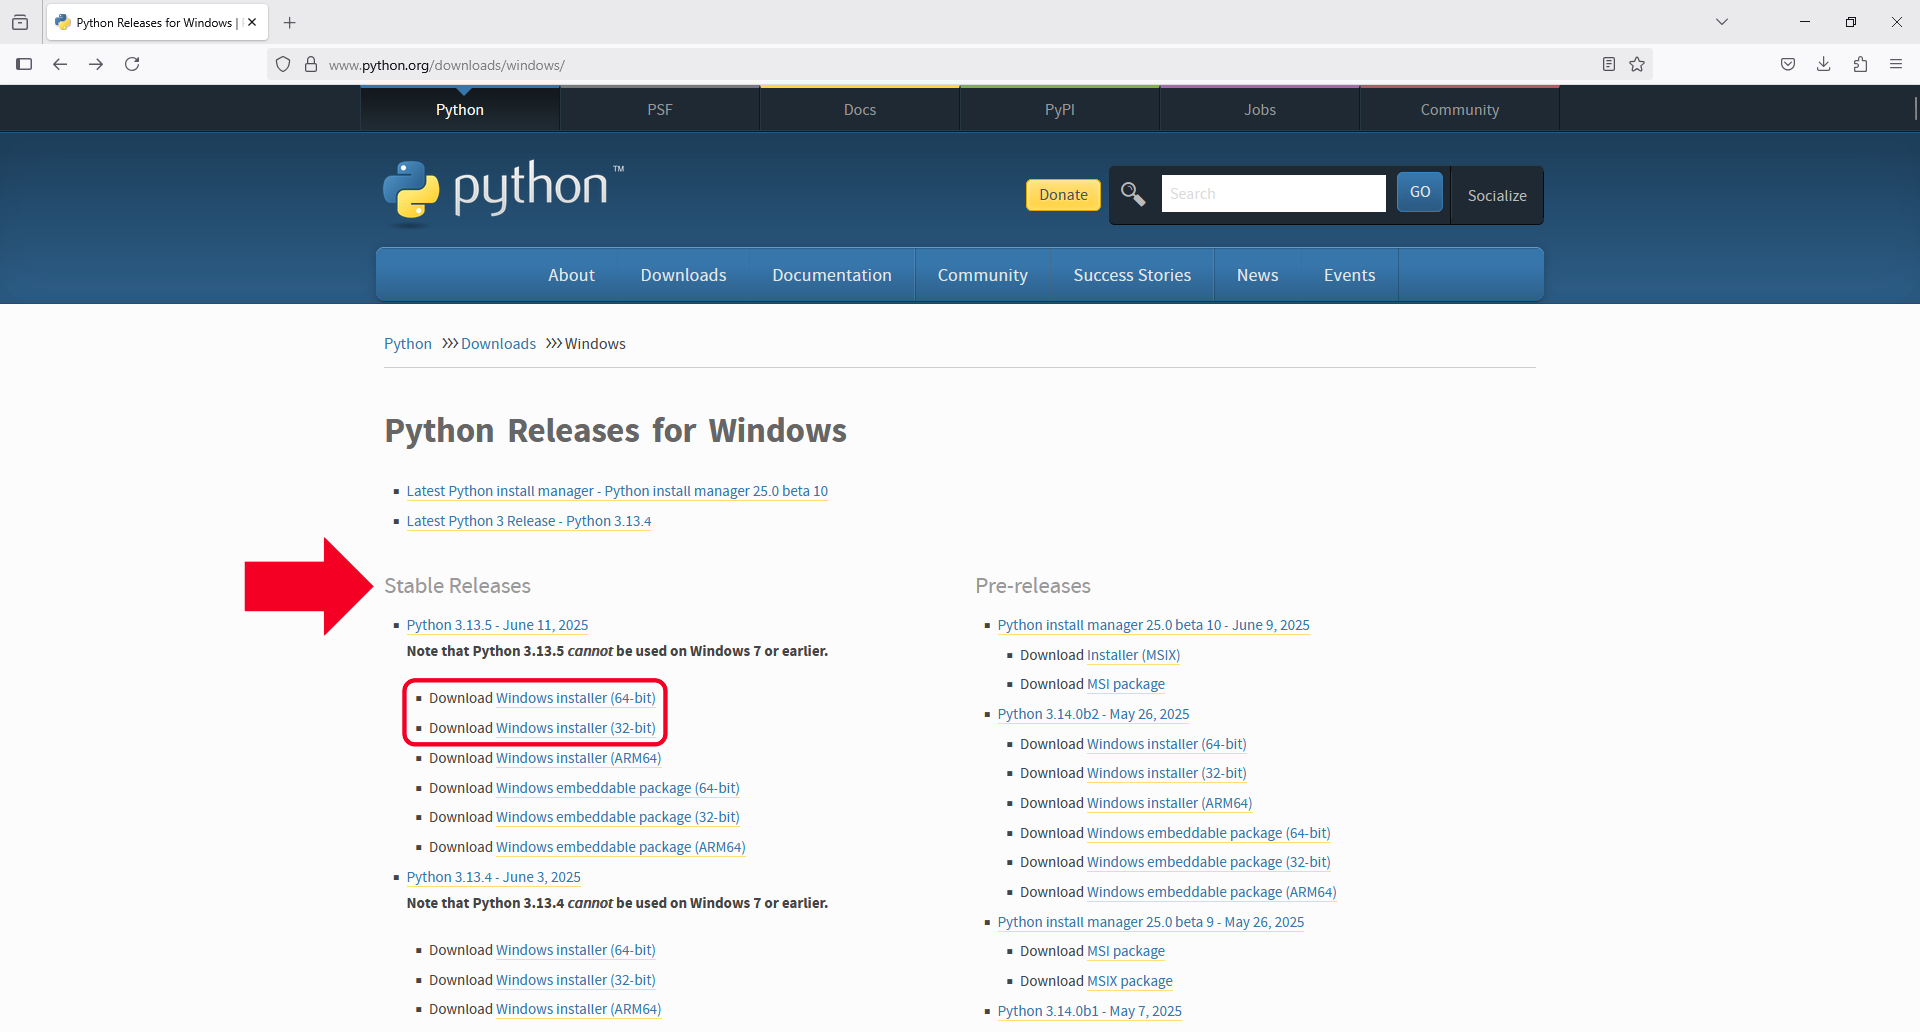
2. Execute o instalador descarregado e siga as instruções apresentadas no ecrã.
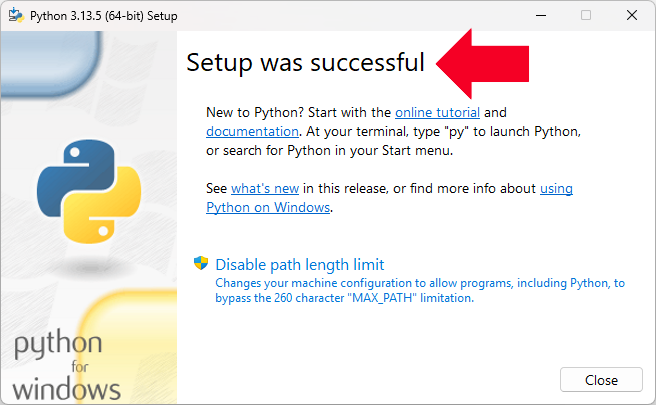
3. Quando o instalador apresentar “A configuração foi concluída com sucesso,” o Python estará pronto.
Passo 3: Instalar o PyCharm
1. Descarregue a PyCharm Community Edition em jetbrains.com/pycharm/download.
2. Execute o instalador e siga as instruções apresentadas. Aceite as definições padrão, a menos que tenha preferências específicas.

Passo 4: Configurar o Ambiente no PyCharm
1. Abrir o Projeto
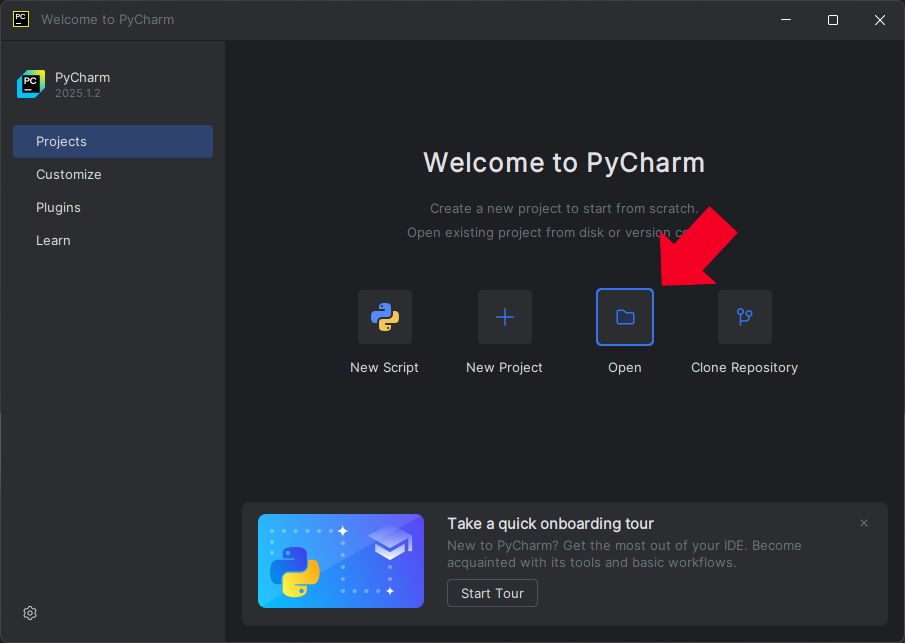
1. Abrir o PyCharm.
2. Clique em “Abrir”.
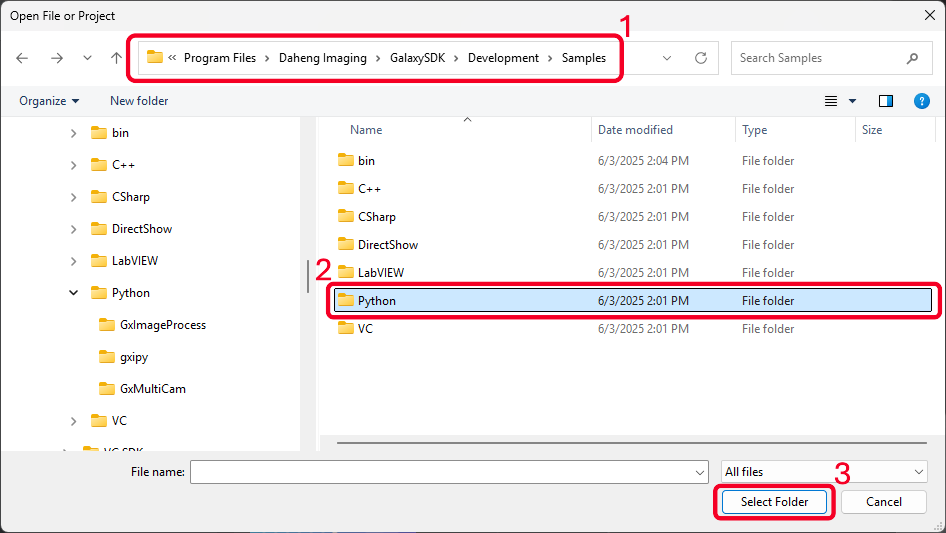
3. Navegue até ao seguinte caminho:
C:\Program Files\Daheng Imaging\GalaxySDK\Development\Samples\Python
Selecione a pasta “Python” e, em seguida, clique em “Selecionar Pasta.”
4. Quando for solicitado com “Confiar e Abrir Projeto?”, clique em “Confiar no Projeto.”
Nota: Certifique-se de que a pasta gixpy (biblioteca Galaxy SDK Python) está presente no diretório do projeto.

2. Instalar os Pacotes Python Necessários
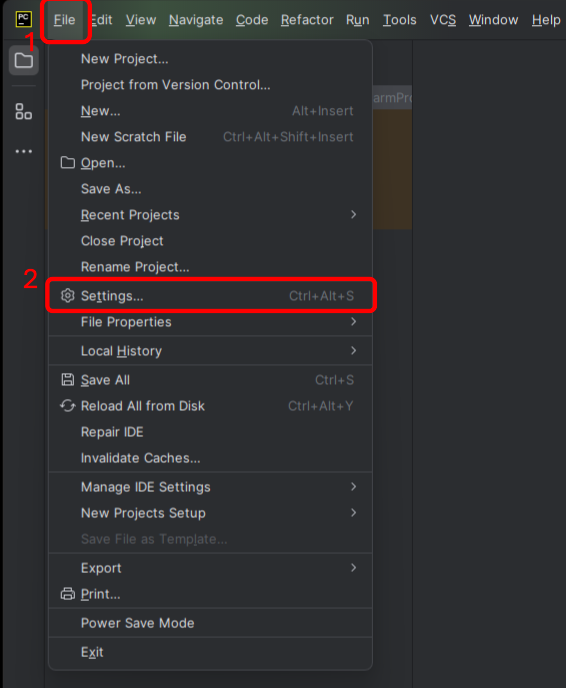
1. Depois de abrir o projeto, vá a Ficheiro > Definições.
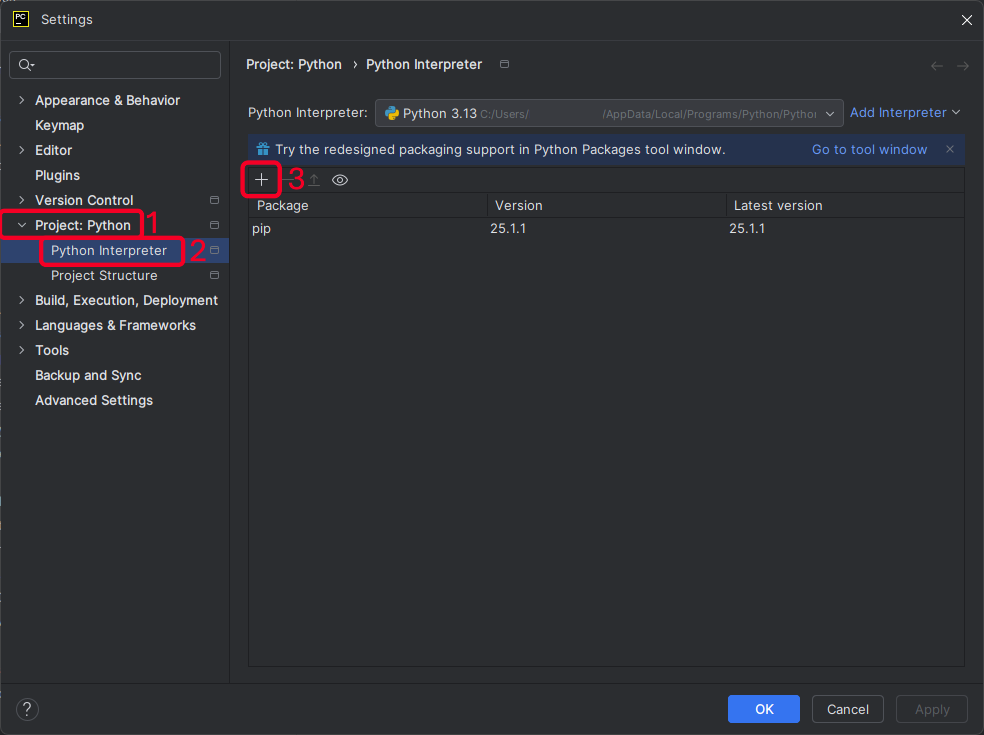
2. Em Projeto > Interpretador Python, clique no ícone “+” para adicionar pacotes.
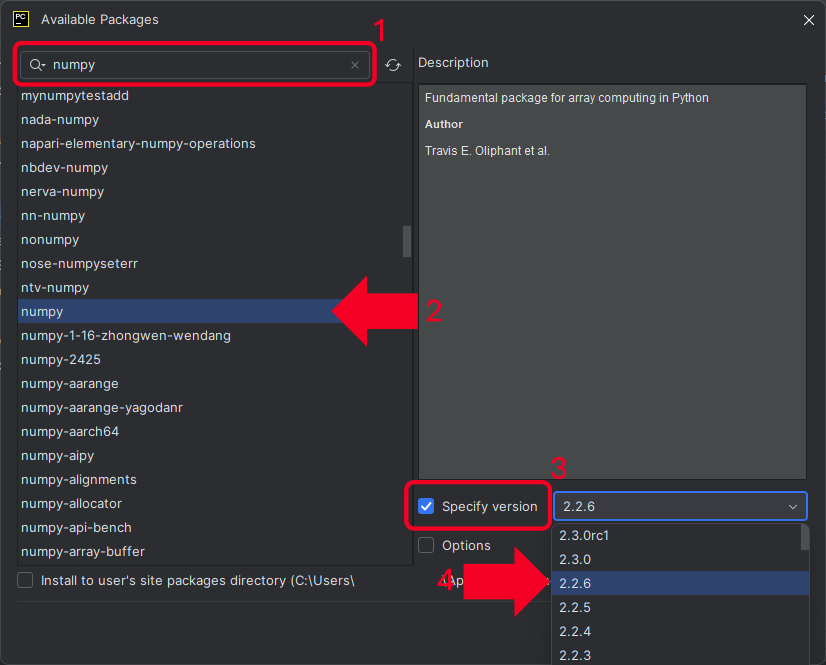
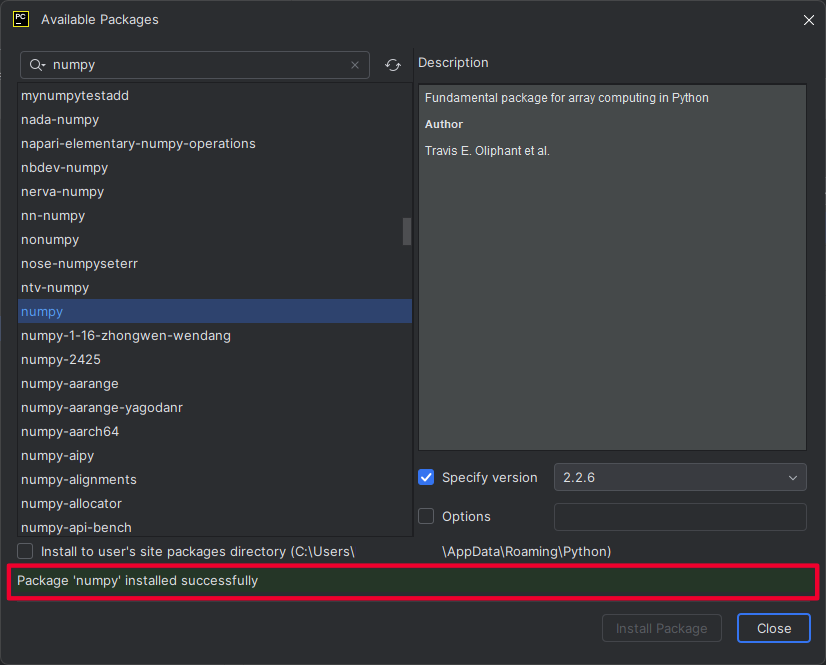
3. Procure o pacote “numpy” e selecione a versão 2.2.6 ou inferior.
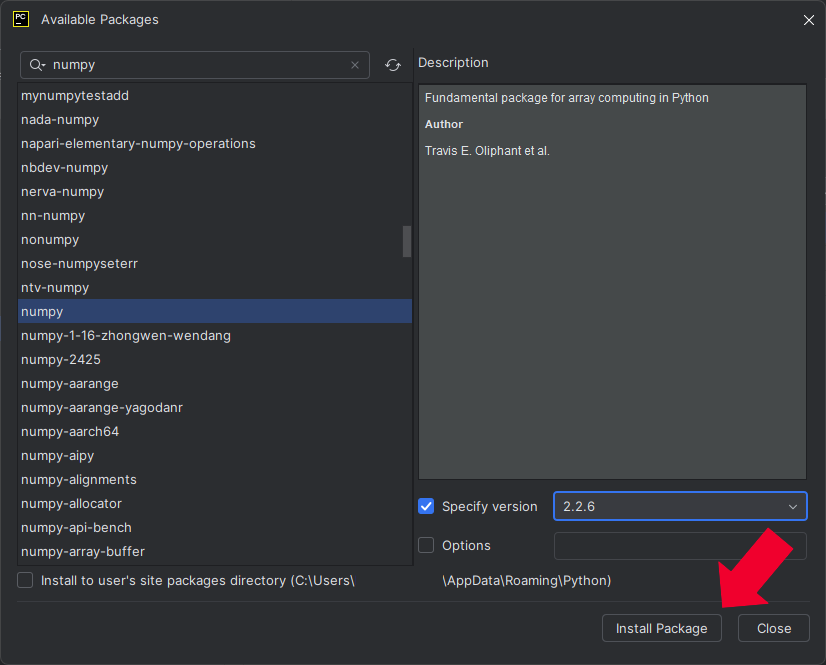
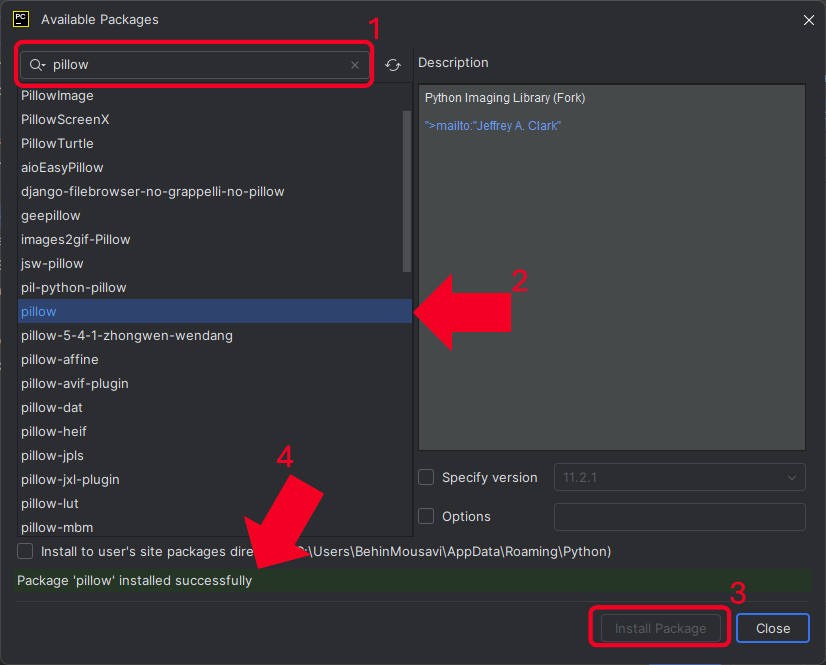
4. Clique em “Instalar Pacote”.
5. Deverá ver uma mensagem de confirmação verde assim que a instalação estiver concluída.
6. Repita o processo para o pacote “pillow”, mas instale a versão mais recente (testado até à 11.2.1).
3. Verificar o Interpretador Python
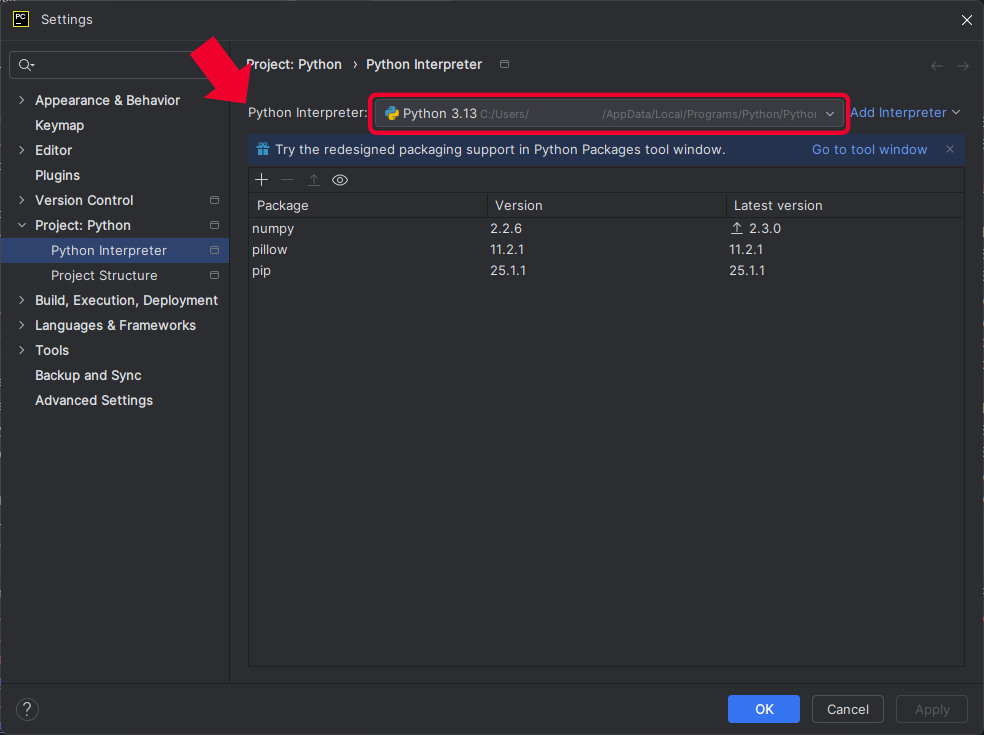
• O PyCharm deve detetar automaticamente a instalação do Python do Passo 2.
• Se não detetar, certifique-se de que o Python está devidamente instalado e configurado em Projeto > Interpretador Python.
Passo 5: Execute um Programa de Amostra e Adquira uma Imagem
1. No projeto, abra qualquer amostra de script que se adeque ao seu caso de utilização.
2. Clique em Executar para executar o programa.
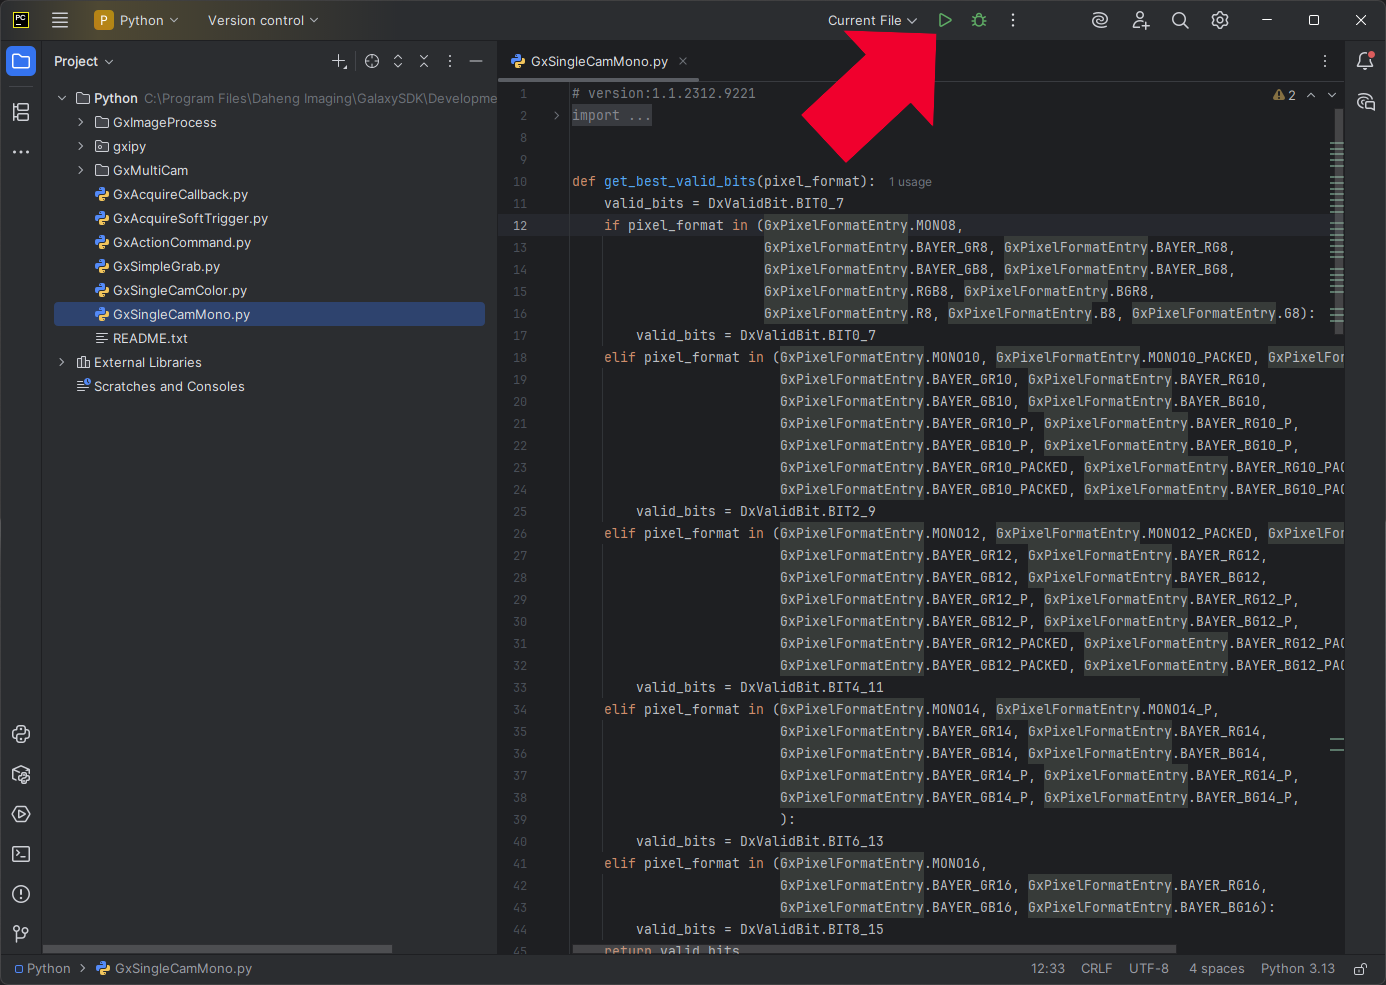
3. Confirme que o script é executado sem erros e que a aquisição de imagem é bem-sucedida.
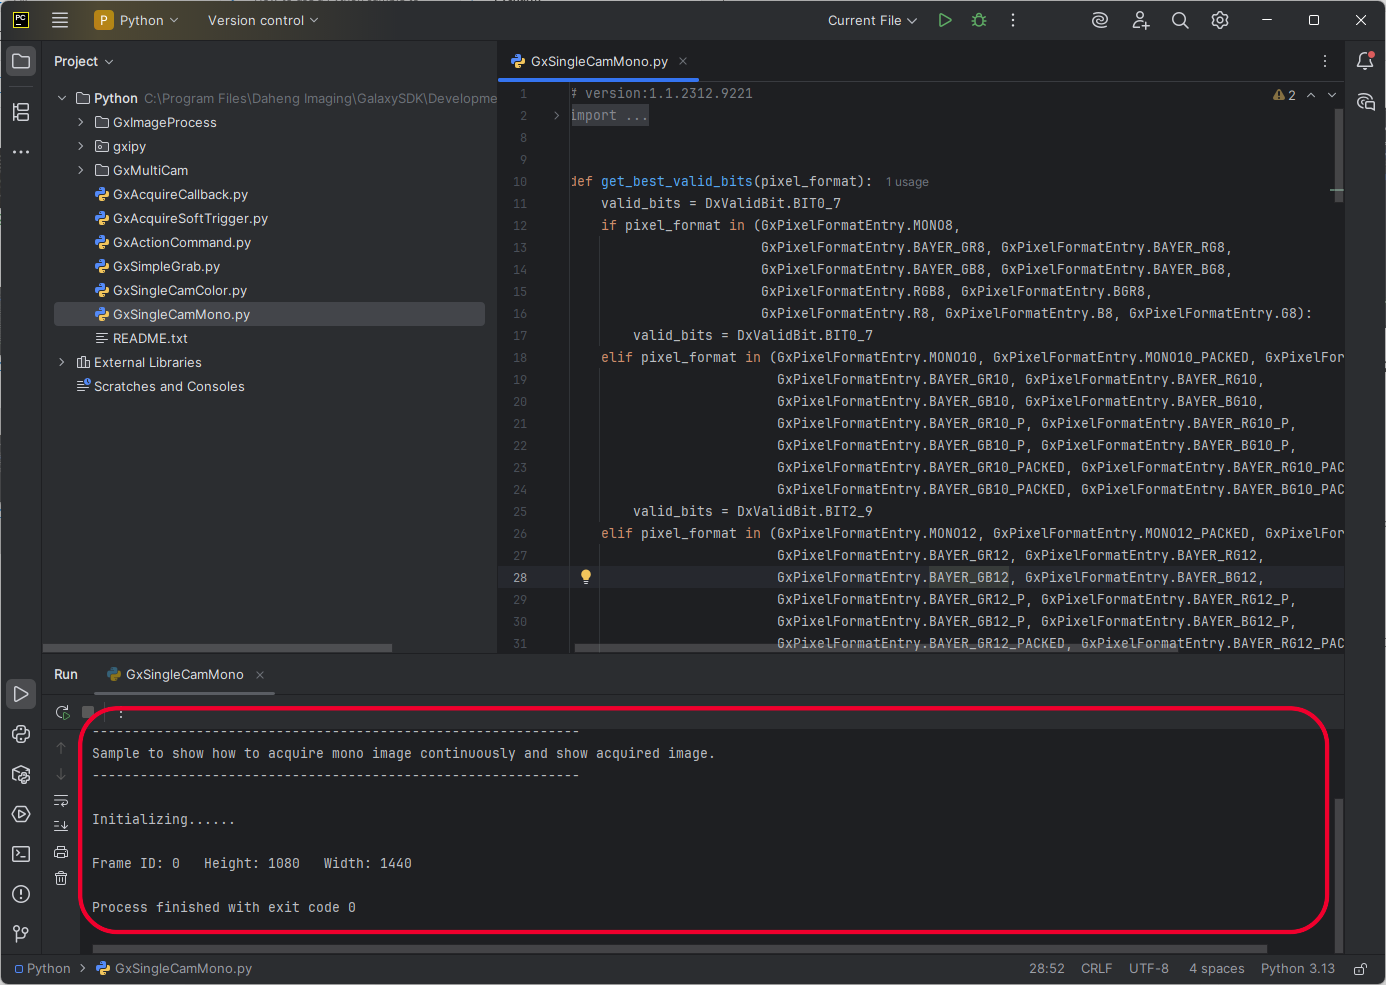
Se seguiu estes passos, já pode adquirir imagens executando scripts Python no PyCharm.
Se tiver alguma dúvida sobre o download, instalação e execução do Python e do PyCharm, não hesite em contactar a nossa divisão de Suporte Técnico ou preencher o formulário abaixo. Eles estão sempre disponíveis para o ajudar.


