How to Connect Multiple GigE Industrial Cameras to a Single Network Port
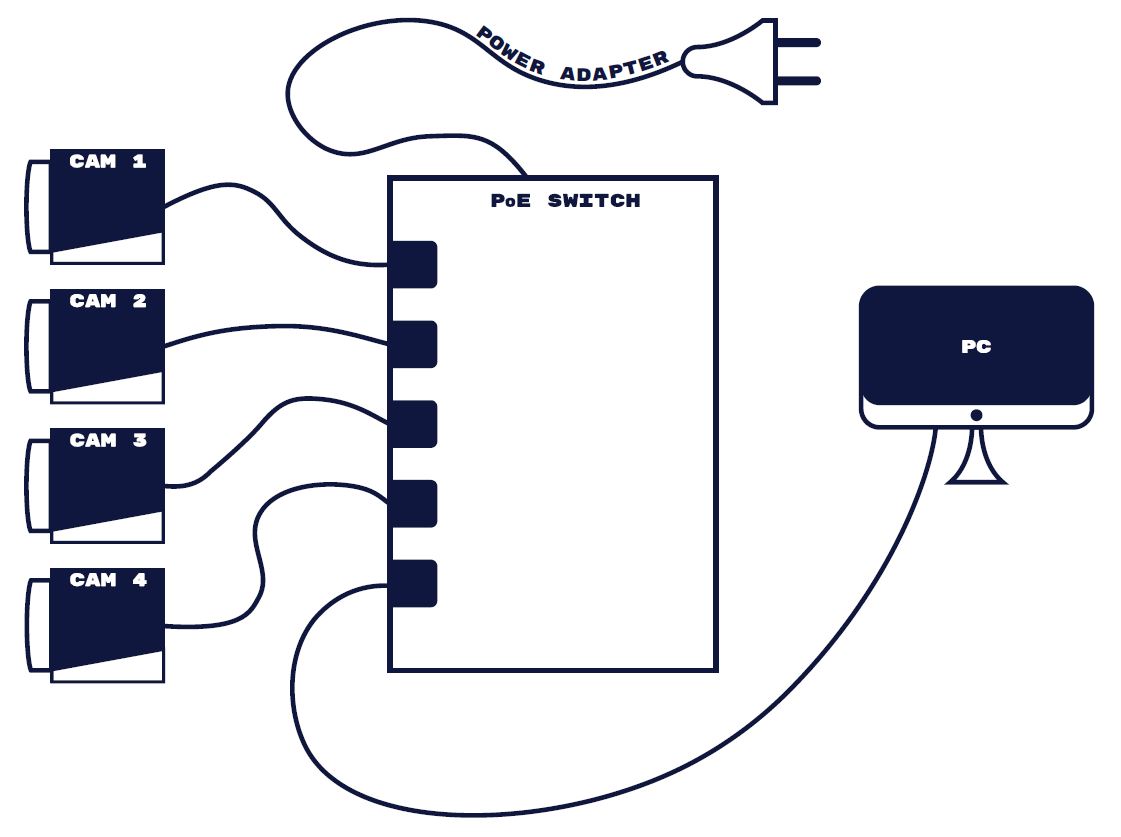
For seamless integration of multiple GigE industrial cameras into a single network port, follow this step-by-step guide. In this example, we demonstrate how to connect four industrial GigE cameras using the following components.

Table of contents
Example Equipment
- 4x MER2-630-18GM-P (6.4MP Industrial GigE Cameras)
- 5-Port PoE Switch (1 Gbps)
- PC with Windows 10 and a 1 Gbps Network Card
Important Considerations
Ensure that your connection supports 1 Gbps (1000 Mbps) and not 100 Mbps. Some PoE switches only support 100 Mbps, which may cause connectivity issues. We frequently encounter cases where customers believe they have a 1 Gbps connection when they are using a 100 Mbps connection.
To verify your connection speed, check after connecting the industrial GigE camera.
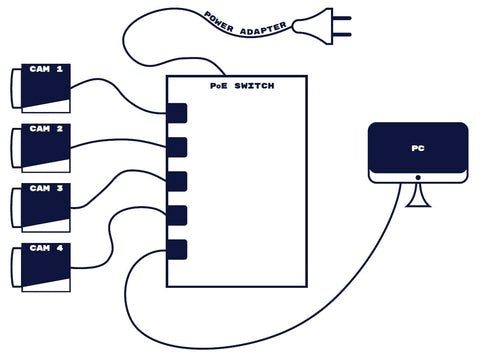
Step 1: Connect GigE Cameras to the PoE Switch
Connect all GigE cameras to the PoE switch and confirm that the LED indicator on the back of each camera is illuminated green. This confirms that the camera is receiving power.

Step 2: Assign Unique IP Addresses
Each GigE industrial camera must have a unique IP address. Below is an example structure:
- Camera 1: 192.168.0.51
- Camera 2: 192.168.0.52
- Camera 3: 192.168.0.53
- Camera 4: 192.168.0.54
You can configure these addresses using the GigE IP Configurator included in our SDK.
Step 3: Calculate Packet Size and Packet Delay
Packet size and packet delay control the bandwidth allocation for industrial GigE cameras. When using multiple cameras on one system, bandwidth reduction is necessary to ensure stable image transfer.
Bandwidth Allocation:
10% of the PC's network bandwidth is reserved for packet retransmission, leaving 90% available.- 1 Gbps = 1000 Mbps = 125 MB/s
- Usable bandwidth: 125 MB/s × 0.9 = 112.5 MB/s
- With 4 cameras, each can be used up to: 112.5 MB/s ÷ 4 = 28.1 MB/s per camera
- Max frame rate per camera: 18fps / 4 = 4.5 fps
Defining Packet Size (GevSCPS) & Packet Delay (GevSCPD):
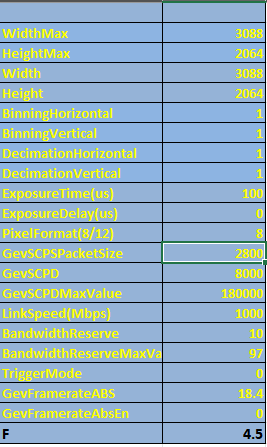
Open the Frame Rate Calculator from our download page. Follow these steps:
- Set Exposure Time to 100.
- Set GevSCPD (Packet Delay) to 8000.
- Adjust GevSCPS (Packet Size) to achieve a frame rate below 4.5 fps (max value: 8192).
- If the frame rate is significantly lower than expected, reduce GevSCPD to increase the frame rate to just below 4.5 fps

Step 4: Program Packet Size and Packet Delay
After determining the correct values, apply these settings to each connected industrial camera. Refer Step 3.
Step 5: Additional Considerations for Multiple Cameras Connected to one PC
If the GevSCPD value exceeds 1000, increase the Packet Delay Timeout to prevent incomplete image transfers.
Recommended Network Switches
We offer two types of 1 Gbps PoE network switches ideal for connecting four industrial PoE GigE cameras:
1. Consumer-Grade PoE Switch
- Mounting: Wall-mounted or table use
- Operating Temperature: 0°C to 40°C
- Power Supply: External
- Best for: Office environments
2. Industrial-Grade PoE Switch
- Mounting: DIN rail
- Electromagnetic Resistance: Less sensitive to electrical noise
- Operating Temperature: -40°C to 75°C
- Power Supply: Sold separately
- Best for: Harsh industrial environments
For more details, fill in the support application below or contact our technical team for assistance.


